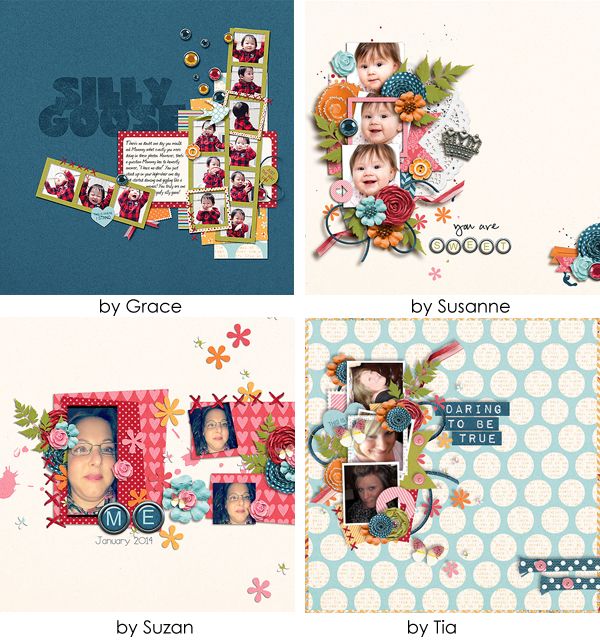
For today I have a little trick that might make your scrapping easier. Have you ever been bored of doing the same thing over and over again and wondered if there could be shortcuts to ease your life? I'm talking specifically about resizing your layout for posting on the web.
After I'm done with my layouts I have to get them ready to post online and they need to be resized to 600x600 pixels (usually) and saved at a resolution of 72 pixels/inch. This can become tedious when it could be done in one single click using an action. Of course you could find one already made and pay the price for it but why would you do that when you can make it yourself?
Here are some easy steps to create your own resizing action with Photoshop:
- Start with your layout (all layers should already be merged
together)
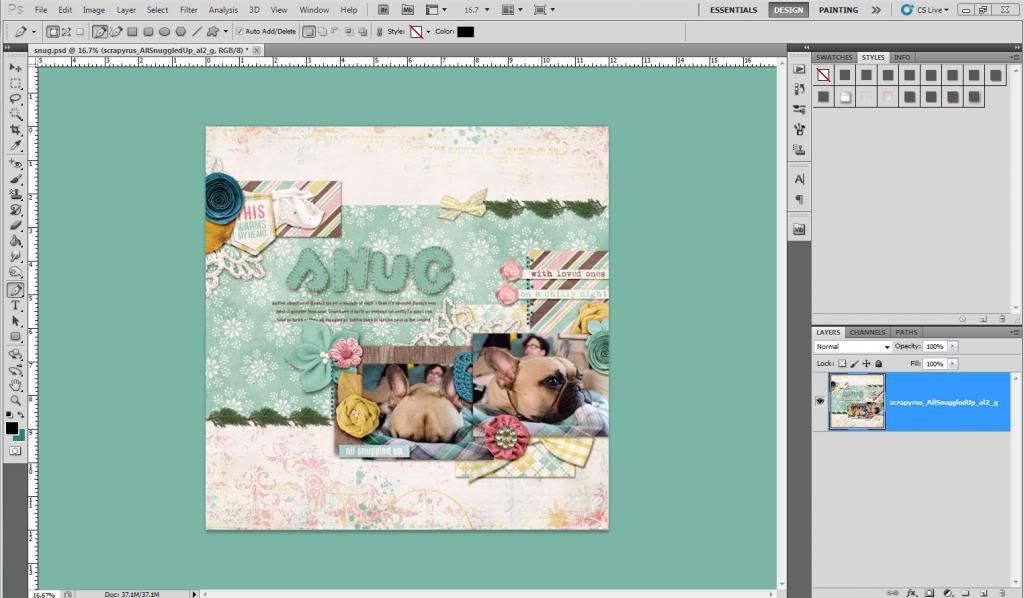
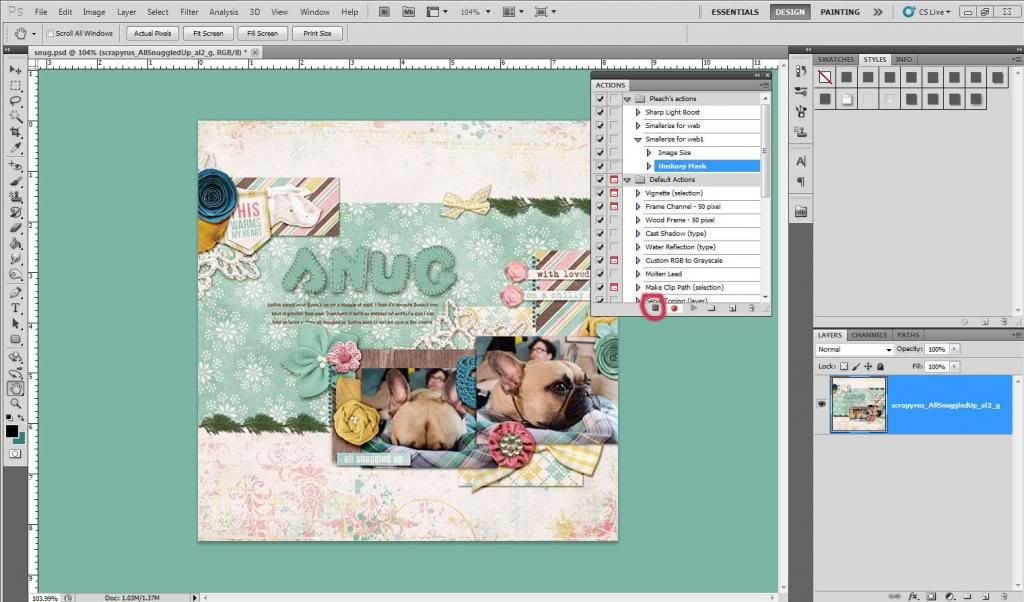
- Open the Action window, usually represented by a black triangle inside of a white rectangle. Or go to Window>Actions or with the keyboard shortcut Alt+F9
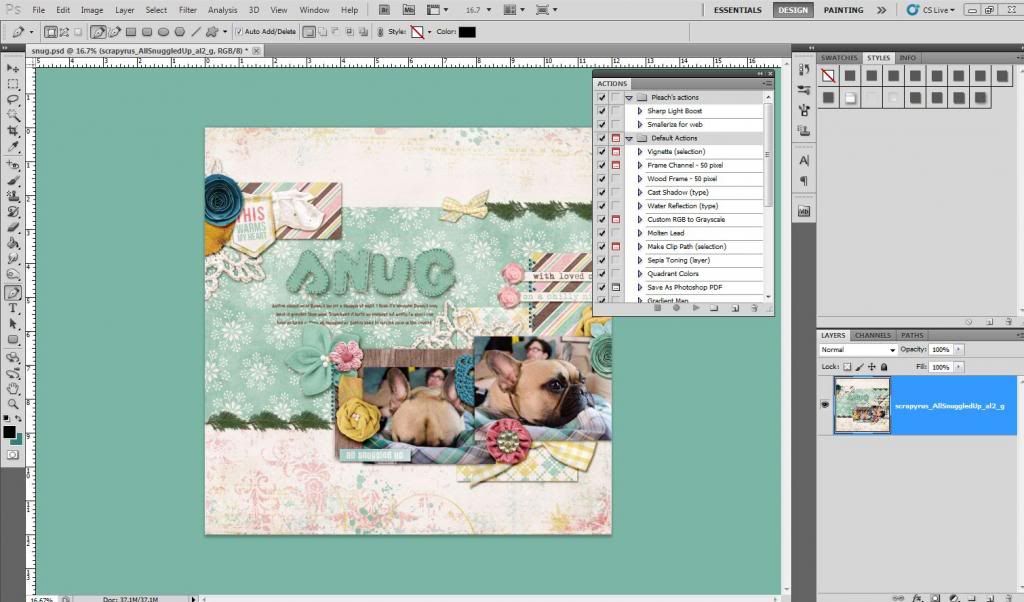
- Create a new set. This will allow you to have a folder with
your own actions to make it easier to find later. Give your set a
name. I named mine Pleach's actions (my husband calls me Pleach)
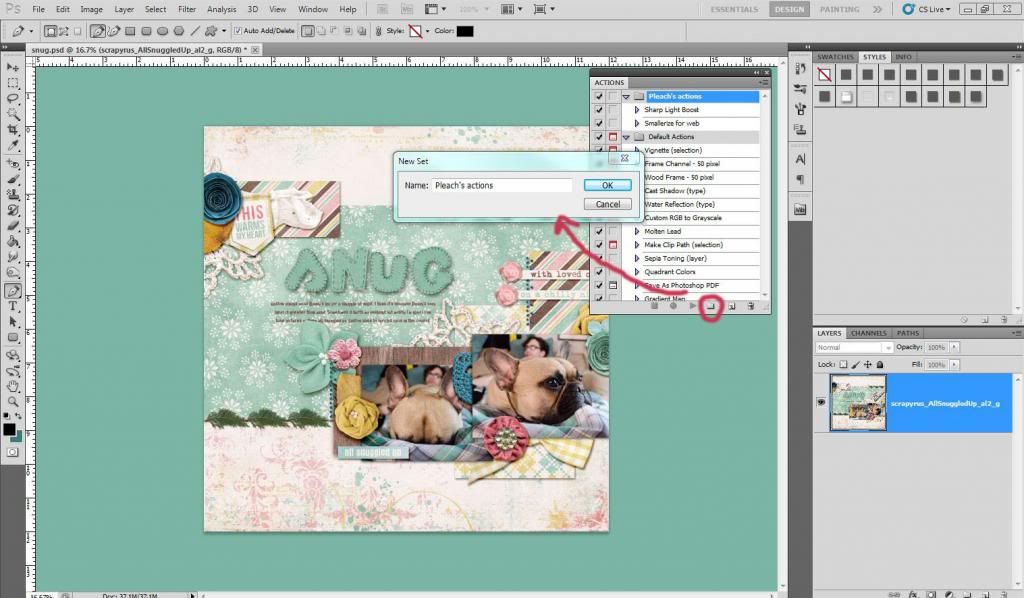
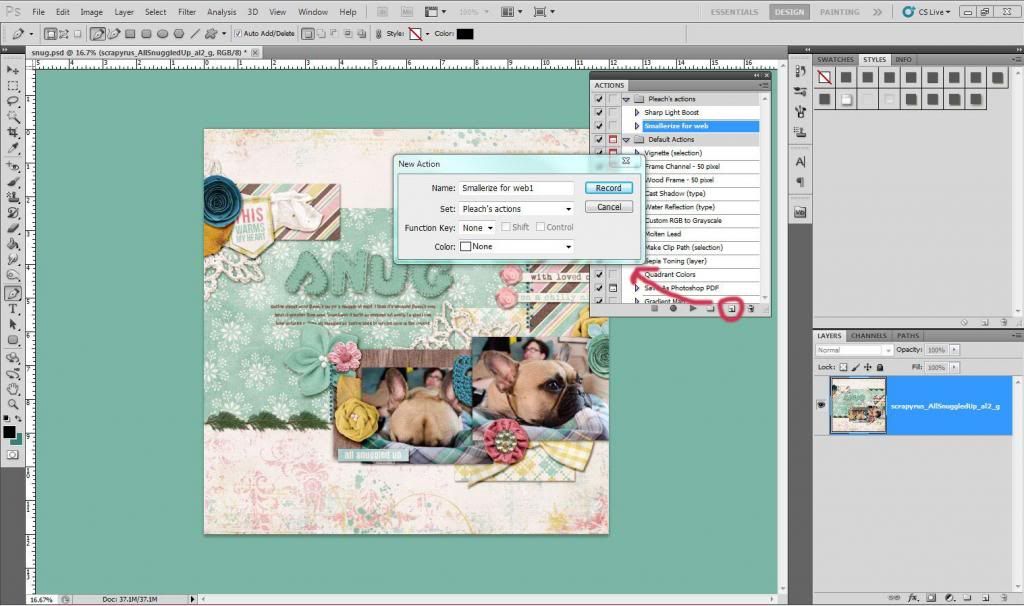
- Create a new action. Give a name to your action. I named mine Smallerize for web (notice I even created my own word there?). Leave everything else as is. And click Record.
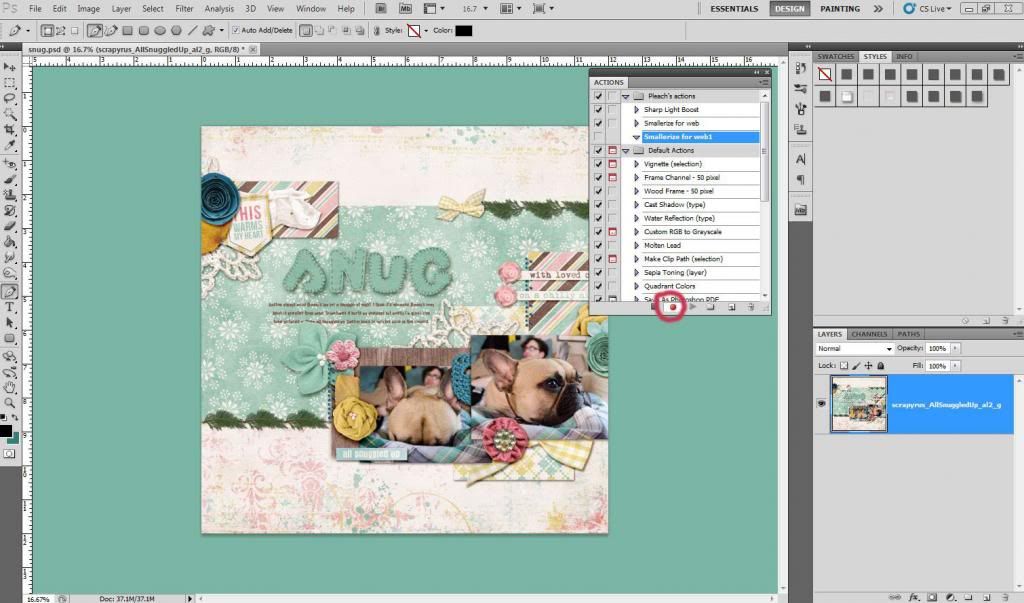
- Notice the circle turned red. It means all your actions will
now be recorded. The first time I did this I felt rushed and got
stressed out because I thought it was timed for some silly reason...
but don't stress. Take your time.
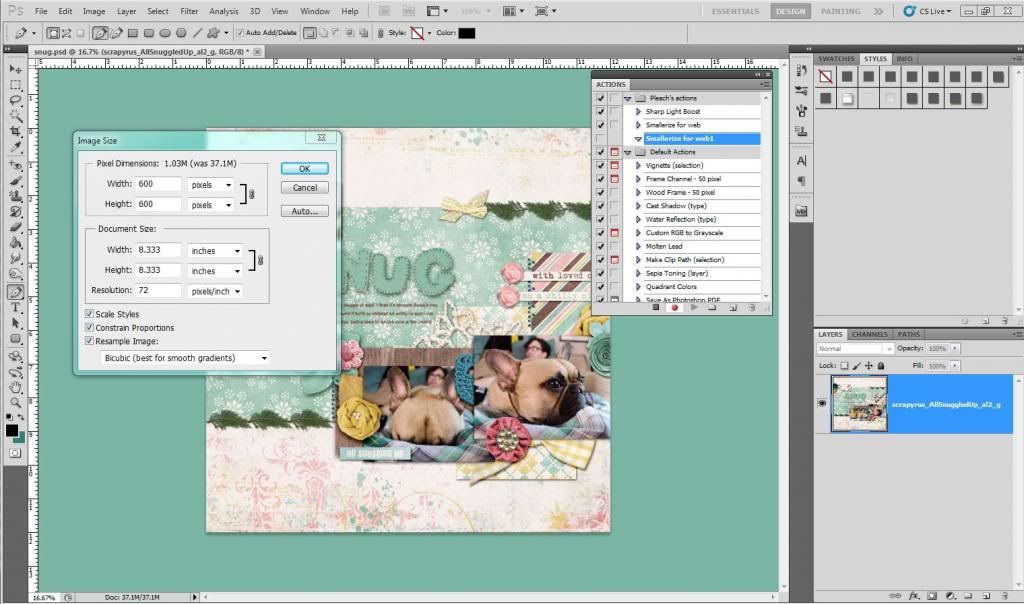
- Now on to recording the settings we want. Go to Image> Image size. First change the resolution from 300 to 72 pixels/inch. Make sure the box “Constrain Proportions” is ticked. Change the dimensions of your layout from 3600 to 600 pixels. It will change both width and height at the same time. Click ok.
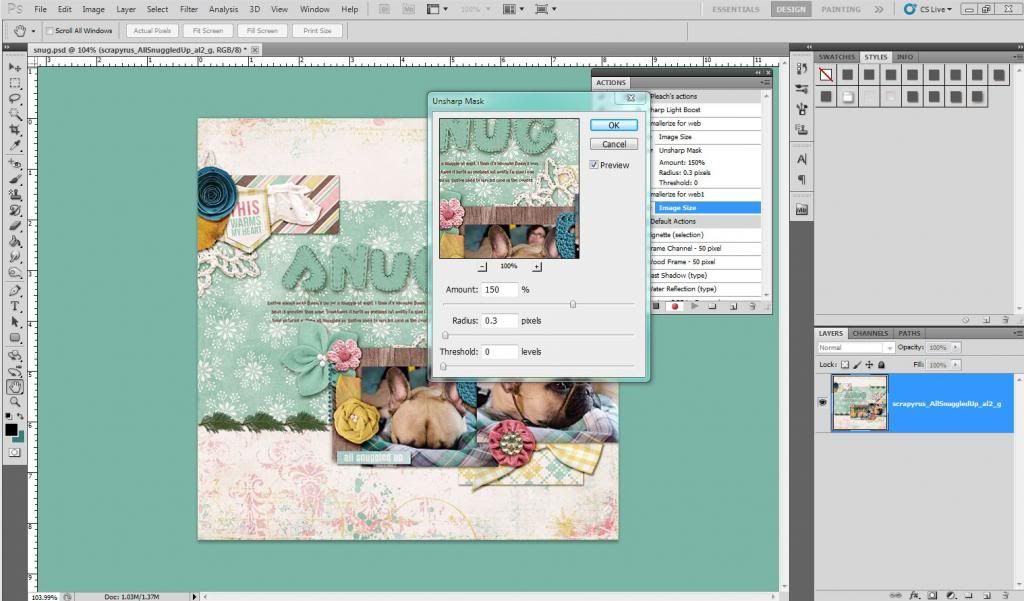
- I like to sharpen my layout at this point. You can choose to
skip this step. Open Filter>Sharpen>Unsharp Mask... Adjust
the settings as is: Amount 150%, Radius 0.3 pixels and Threshold 0
levels. Click ok.
- To finish your action click on the square at the bottom of the actions' window. The red circle should now turn black again.
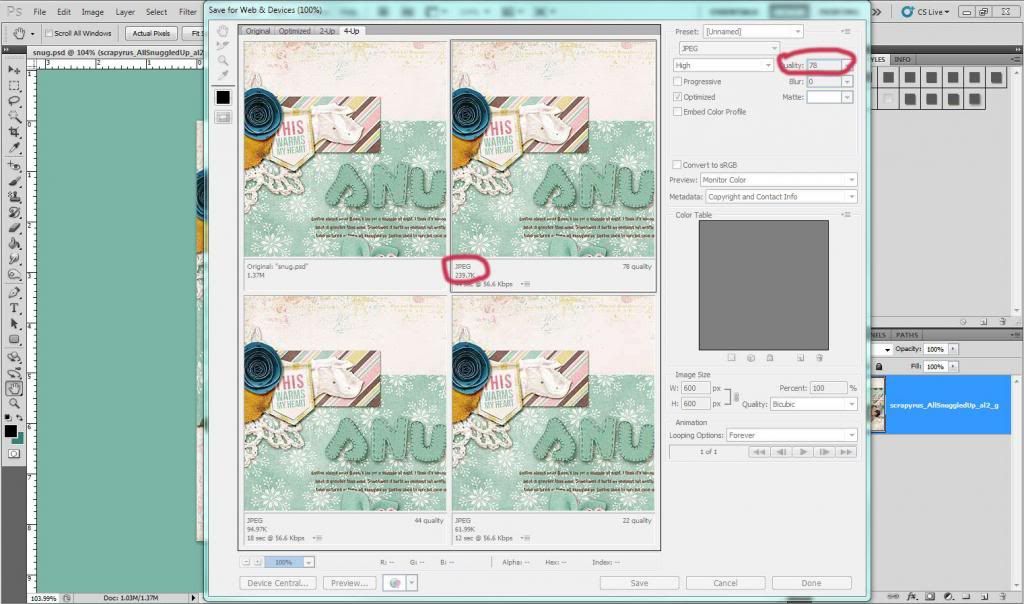
- Now all you need to do is save your layout. Go to File>
Save for web and devices. A window will open with 4 sneak peeks of
your layout. I select the top right corner and play around with the
quality so it's just below 250k (most galleries' maximum layout
size). Click save and choose a name for your file. And you are
done.
Good luck with this tutorial. We hope you enjoy it!
If you have enjoyed this
tutorial, please feel free to share it, but you are not allowed to
copy its content or to claim it as your own. You can download a pdf version of this tutorial here. We hope you enjoy it!
It's even better to share the link to the blog as we will be adding new tutorials regularly on scrapyrusdesigns.blogspot.com
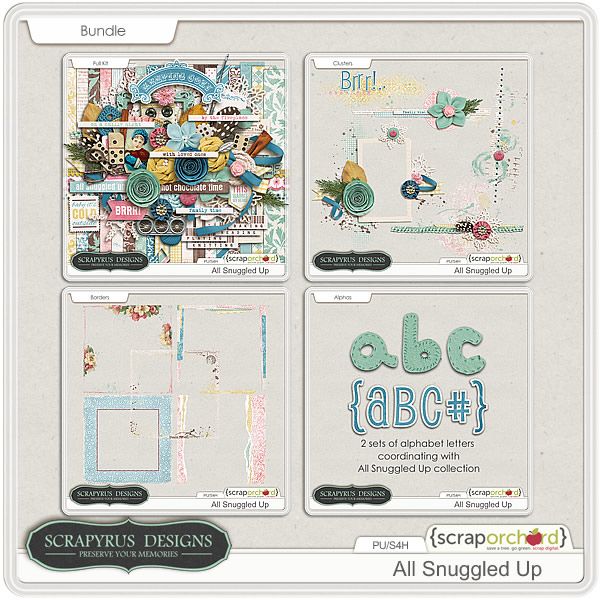
Products used in this tutorial:
|
|