
Imagine that you are typing your journaling onto a journal card that contains lines but your journaling doesn't quite land directly onto those lines. It ends up looking not so pretty. I'm sure that this problem has occurred to you before. And there is an easy solution to this problem. Let me show you how.
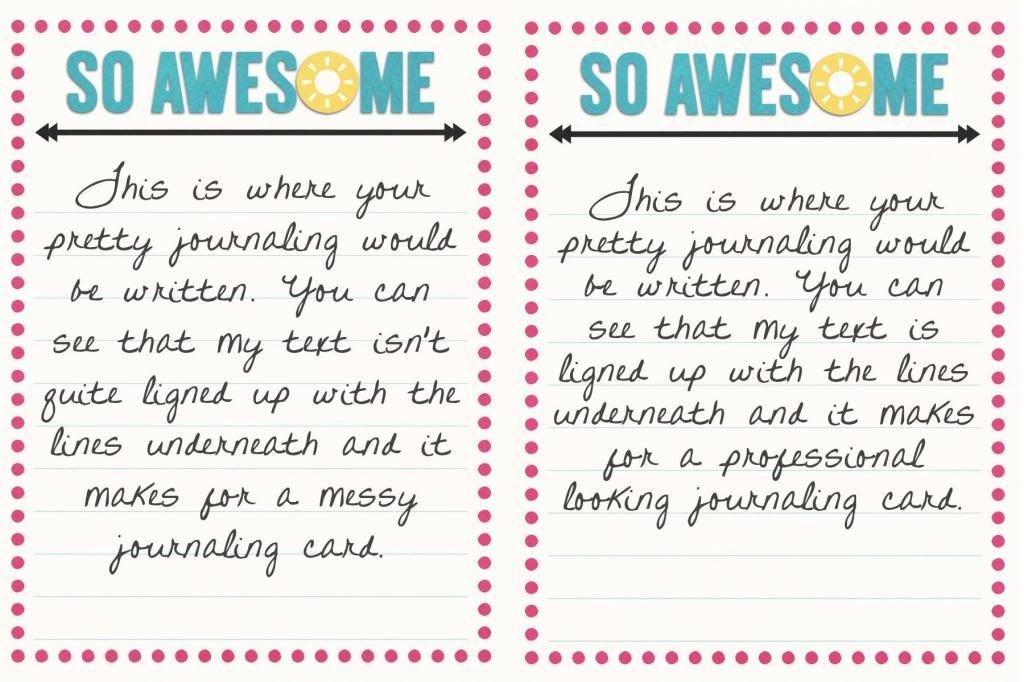
Here is a before and after example:
Let's get to learning how to achieve this look, shall we?
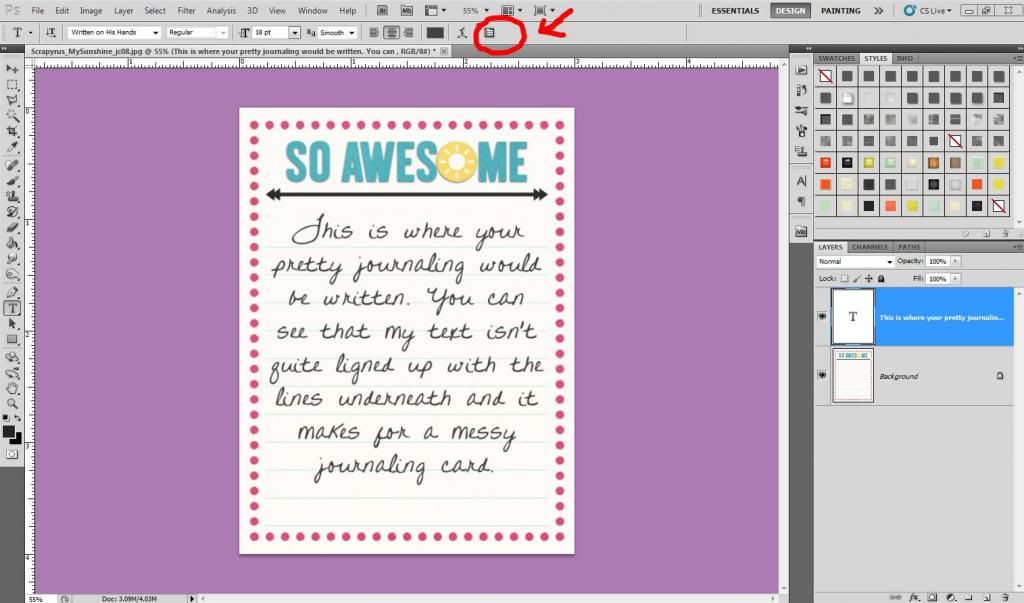
- Open your journal card in Photoshop. I'm using a journal card from the kit My Sunshine by Scrapyrus Designs.

- Use the horizontal type tool or just type the letter T on your keyboard.
- Click one upper corner and drag your mouse to the opposite corner of your journaling card within the lines. This will define the area where you want your text to be. Release the mouse. You should have a dotted line rectangle and small white squares at each corner. You can resize this rectangle later by dragging each of the little squares in the corners.
- Select a font and adjust the size of your font according to your liking. In my case I'm using a font called Written On His Hands at size 18 pt.
- Type in your text.
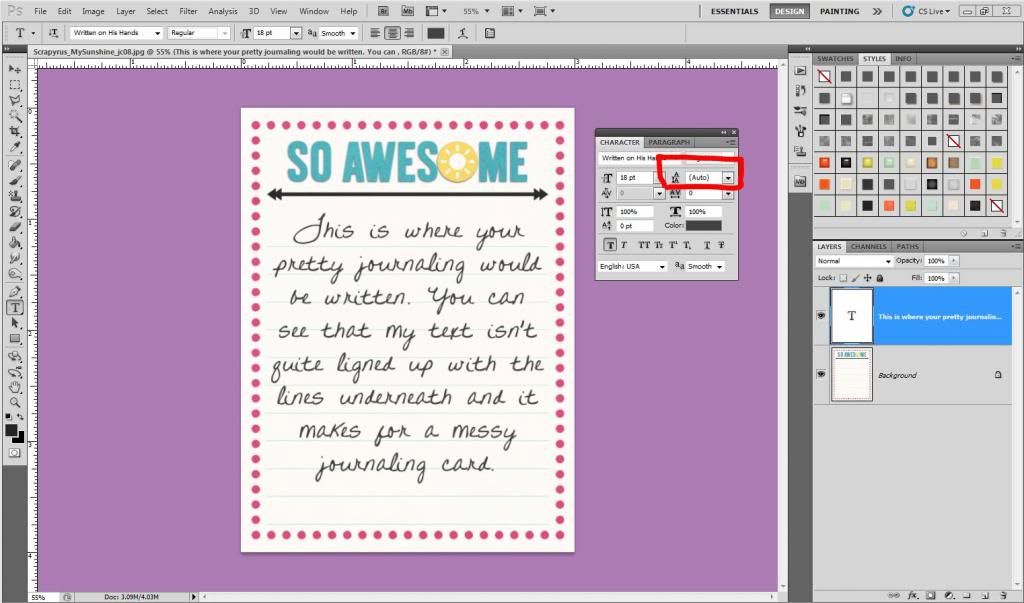
- Most likely your text doesn't line up with the journaling lines. To adjust this setting, open the character and paragraph panel. You can click on the very right icon in the tool bar or click “Window> Character”. A small panel will open.
- Take a look at the upper right setting. They call it “the leading”. Most likely it will be set to “auto”. We want to adjust that number. Click the drop down arrow and start picking numbers and see how it affects the spacing between lines. I set mine at 18 pt. You will see that you need one last adjustment.
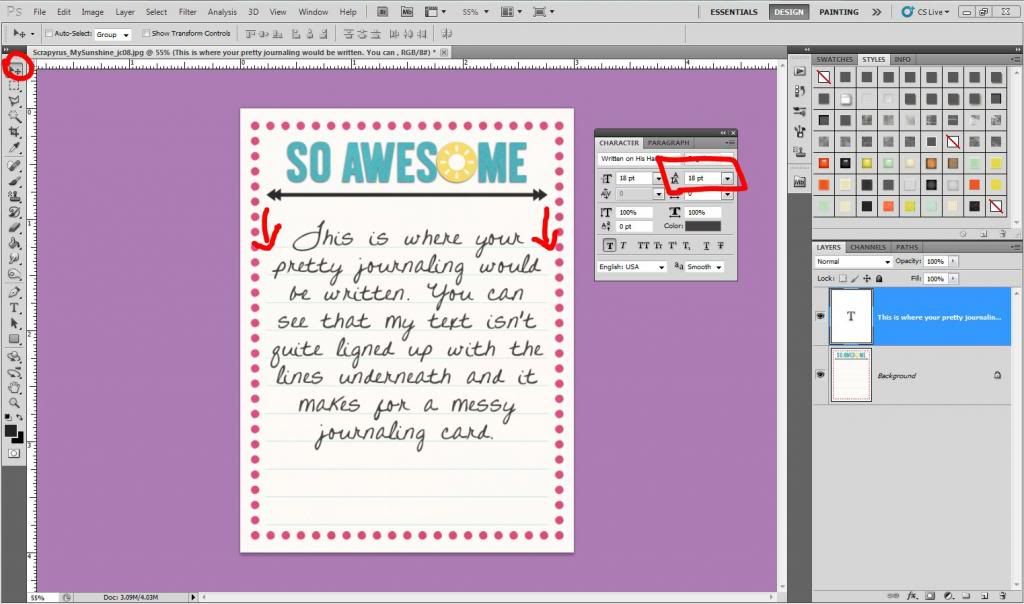
- For the last step, make sure to have the first line of your text lined up with the first line of the journaling card. To do that, use the Move tool (v on the keyboard) and use the up and down arrows on your keyboard to move the journaling up or down. Once your text is aligned with the top line of journaling you will be able to see if the “leading” is correctly set. If not, start over from step 7.
- And you are done! How easy was that?
You can download a pdf version of this tutorial here. We hope you enjoy it!
If you have enjoyed this tutorial, please feel free to share it, but you are not allowed to copy its content or to claim it as your own.
It's even better to share the link to the blog (scrapyrusdesigns.blogspot.com) as we will be adding new tutorials regularly.
Products used in this tutorial:
 |
| My Sunshine | Journal Cards by Scrapyrus Designs @ Scrapbookgraphics |
thanks a lot ! i shared the link here : http://www.pinterest.com/lemondedis/photoshop-freebies-tutorials/
ReplyDeleteThanks for sharing this informative information love to see these kind of Photoshop tutorial.
ReplyDelete